The Frugal Home: 15 DIY Hacks to Reduce Utility Costs by 25% This Winter
Discover 15 practical DIY hacks to significantly reduce your home's utility costs this winter. From simple insulation fixes to smart heating strategies, these tips will help you save up to 25% on your bills and create a more energy-efficient home.
By: Matheus Neiva on November 9, 2026
The Frugal Home: 15 DIY Hacks to Reduce Utility Costs by 25% This Winter
The Frugal Home: 15 DIY Hacks to Reduce Utility Costs by 25% This Winter
As the days grow shorter and the temperatures plummet, many homeowners brace themselves not just for the cold, but for the inevitable spike in utility bills. The dream of a cozy, warm home often clashes with the reality of escalating heating costs. But what if you could significantly reduce utility costs this winter without sacrificing comfort? What if you could achieve a remarkable 25% reduction in your energy expenses through simple, affordable, and effective DIY hacks? This comprehensive guide is designed to empower you with the knowledge and practical steps to transform your home into an energy-efficient haven, keeping both you and your wallet warm.
Winter brings with it a unique set of challenges for household budgets. Heating, lighting, and even hot water consumption tend to increase, putting a strain on finances. However, the good news is that many of the factors contributing to high utility bills are within your control. With a proactive approach and a willingness to implement some smart DIY solutions, you can make a substantial difference. Our focus today is on actionable strategies that are not only effective but also accessible, requiring minimal investment and often just a few hours of your time. By the end of this article, you’ll have a clear roadmap to a more frugal and energy-efficient home, ready to tackle winter head-on and enjoy significant savings.
Understanding where your energy goes is the first step toward saving it. Heating accounts for the largest portion of winter utility bills in most homes. Air leaks, poor insulation, inefficient windows, and outdated heating systems are common culprits. But don’t despair! Even small changes can lead to big savings. We’ve curated 15 powerful DIY hacks, ranging from quick fixes to slightly more involved projects, all aimed at helping you reduce utility costs by a notable margin. Let’s dive into these practical solutions and start building a warmer, more affordable winter for your family.
1. Seal Up Drafts and Leaks: The First Line of Defense Against High Bills
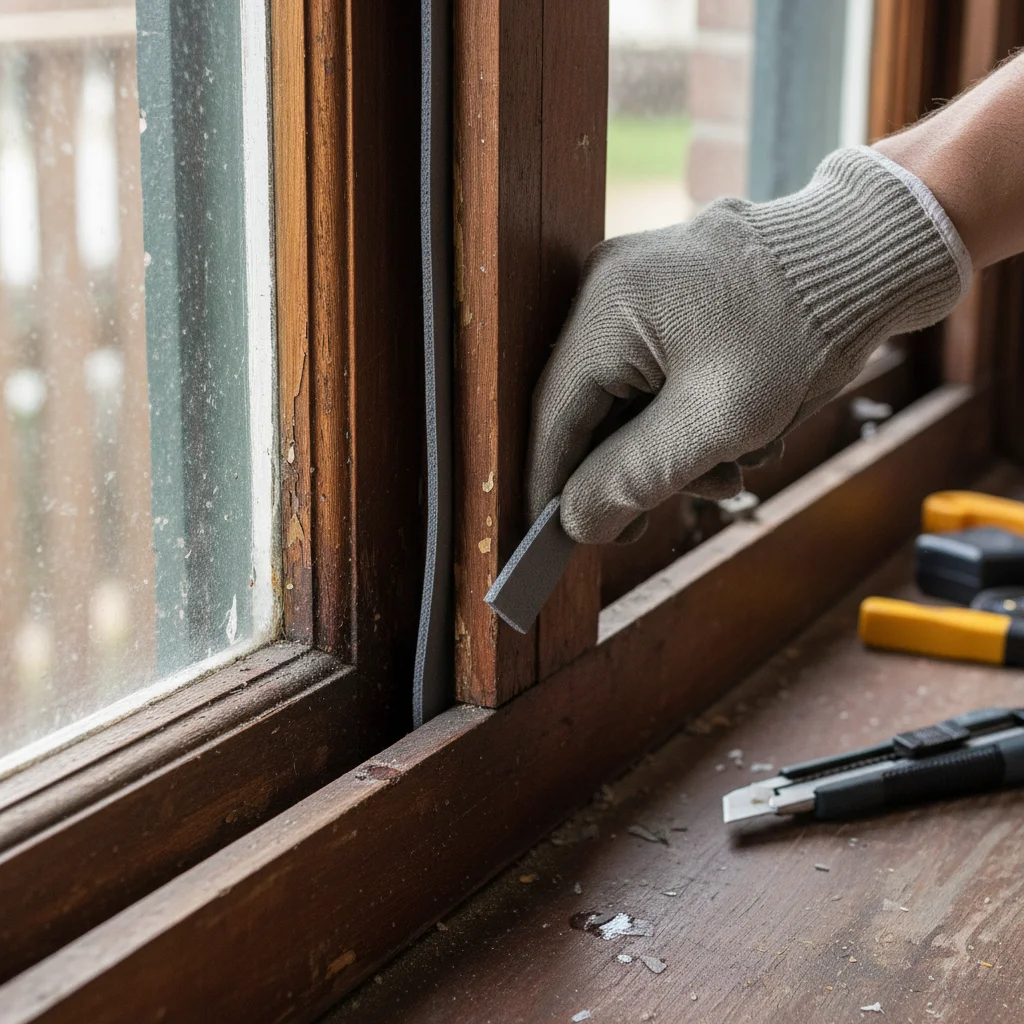
Drafts are notorious energy thieves, allowing warm air to escape and cold air to seep in, forcing your heating system to work harder. Identifying and sealing these leaks is perhaps the most impactful and easiest way to immediately reduce utility costs. You might be surprised by how much warm air escapes through tiny cracks around windows, doors, and even electrical outlets.
How to Identify Drafts:
The Candle Test: On a windy day, move a lit candle or an incense stick around window frames, doorframes, electrical outlets, and plumbing penetrations. If the flame flickers or the smoke wavers, you have a draft.
The Hand Test: Simply run your hand along these areas to feel for cold air currents.
DIY Sealing Solutions:
Weatherstripping: Apply self-adhesive weatherstripping tape around the edges of windows and doors. This creates a tight seal, preventing air leakage. It’s inexpensive and easy to install.
Caulking: Use caulk to seal cracks and gaps around window frames, door frames, and where different building materials meet. Ensure surfaces are clean and dry before applying.
Door Sweeps/Draft Stoppers: Install a door sweep at the bottom of exterior doors to prevent air from entering under the door. For internal doors leading to unheated spaces, or even exterior doors, a simple fabric draft stopper can be placed at the base. These can be DIY projects using old fabric and sand or rice.
Outlet and Switch Gaskets: These foam gaskets are cut to fit behind electrical outlet and light switch cover plates. They are incredibly cheap and effective at stopping drafts through exterior walls.
By effectively sealing drafts, you create a more contained environment, allowing your heating system to maintain a comfortable temperature with less effort, directly helping to reduce utility costs.
2. Optimize Your Thermostat Settings: Smart Heating for Smart Savings
Your thermostat is your home’s heating control center. How you use it can significantly impact your energy consumption. Many people make the mistake of cranking up the heat when they’re cold, only to open windows later, wasting energy.
Programmable Thermostats:
If you don’t have one, consider investing in a programmable or smart thermostat. These devices allow you to set schedules for different times of the day, automatically lowering the temperature when you’re away or asleep and raising it before you return or wake up. This prevents energy waste when heat isn’t needed.
Recommended Settings:
Daytime (when home): Aim for 68°F (20°C).
Nighttime/Away: Lower the temperature by 7-10°F (4-6°C) for 8 hours a day. This seemingly small change can save you up to 10% on your heating bill.
Resist the Urge to Overheat:
Every degree you raise your thermostat above 68°F (20°C) can increase your heating costs by 3-5%. Instead of setting the thermostat to a very high temperature, try wearing an extra layer of clothing or using a blanket. This simple habit can greatly reduce utility costs.
3. Harness the Power of the Sun: Free Heat from Your Windows
The sun is a powerful, free heat source. During winter, strategically using your windows can contribute significantly to warming your home.
Open Curtains/Blinds: On sunny days, open curtains and blinds on south-facing windows (and east/west-facing windows when the sun is directly hitting them) to allow sunlight to stream in and naturally warm your rooms.
Close at Night: As soon as the sun sets, close all curtains and blinds. This creates an additional layer of insulation, trapping the heat gained during the day and preventing cold air from radiating in through the windows. Thick, insulated curtains are especially effective.
This simple, daily routine costs nothing but can make a noticeable difference in your home’s warmth and help you reduce utility costs.
4. Insulate Your Windows: DIY Solutions for Better Heat Retention
Windows are often major sources of heat loss. While replacing old, inefficient windows can be costly, several DIY hacks can improve their insulation properties.
Window Insulation Kits: These kits typically involve applying a clear plastic film over your windows, which you then shrink with a hairdryer. This creates an insulating air pocket between the window pane and the film, significantly reducing heat loss. They are inexpensive and can be removed easily in the spring.
Heavy Curtains/Thermal Blinds: As mentioned, thick, insulated curtains or thermal blinds add a crucial layer of insulation. Ensure they are floor-length and cover the entire window frame to maximize their effectiveness.
Bubble Wrap Insulation: For windows where aesthetics are less of a concern (e.g., basement windows, utility rooms), you can spray the window with a fine mist of water and press bubble wrap onto the glass, bubble side in. It sticks due to surface tension and creates insulating air pockets. It’s surprisingly effective and cheap.
Implementing even one of these solutions can help you maintain a warmer home and reduce utility costs by preventing heat from escaping through your windows.
5. Check and Improve Attic Insulation: Your Home’s Winter Hat
Just like you wear a hat to keep warm, your home needs good attic insulation to prevent heat from escaping through the roof. Heat rises, and if your attic isn’t properly insulated, much of your expensive heated air will simply float away.
Assessing Your Insulation:
Carefully check your attic’s insulation levels. In many older homes, the insulation might be sparse or compressed. A general rule of thumb is that if you can easily see the top of your ceiling joists, you likely need more insulation. The recommended depth for most attics is between 10 to 14 inches (R-38 to R-49), depending on your climate zone.
DIY Insulation Boost:
Adding more insulation to your attic is a manageable DIY project. You can purchase rolls or batts of fiberglass or mineral wool insulation and lay them perpendicular to your existing joists to cover gaps and achieve the desired depth. Always wear protective gear (mask, gloves, long sleeves) when working with insulation.
Proper attic insulation is one of the most effective long-term strategies to significantly reduce utility costs, as it minimizes heat loss and maintains a consistent indoor temperature.
While attic insulation is critical, walls also play a role in heat retention. For existing homes, full wall insulation can be a big project, but there are DIY-friendly ways to improve it.
Insulating Electrical Outlets/Switches: As mentioned in draft sealing, foam gaskets behind cover plates are crucial.
Insulating Exterior Walls (Small Scale): If you have access to wall cavities (e.g., during a minor renovation or if you have older plaster walls that you can carefully open), you can add blown-in cellulose or fiberglass insulation. This is more involved but can make a huge difference.
Heavy Wall Hangings: While not traditional insulation, tapestries, large framed artworks, or even thick blankets hung on exterior walls can add a small layer of thermal resistance, helping to mitigate heat loss through cold walls.
Every little bit of insulation helps in your quest to reduce utility costs.
7. Insulate Water Pipes and Water Heater: Hot Water for Less
Heating water accounts for a significant portion of household energy consumption. You can make your water heating system more efficient with a few simple DIY steps.
Insulate Hot Water Pipes: Wrap your hot water pipes (especially those running through unheated spaces like basements or crawl spaces) with foam pipe insulation. This prevents heat loss as the hot water travels from the heater to your faucets, meaning less energy is required to maintain water temperature.
Insulate Your Water Heater Tank: If your water heater tank feels warm to the touch, it’s losing heat. An insulation blanket (available at hardware stores) can be wrapped around the tank to reduce standby heat loss. Ensure you follow the manufacturer’s instructions, especially regarding clearance for electric and gas heaters.
These measures ensure that the heat you’re paying for actually gets to where it’s needed, helping you reduce utility costs associated with hot water.
8. Reverse Your Ceiling Fans: Push Warm Air Down
Most ceiling fans have a switch that allows you to reverse the direction of their blades. In winter, this is a simple yet effective hack.
Clockwise Rotation: Set your ceiling fan to rotate clockwise at a low speed. This pulls cool air up and pushes the warm air (which naturally rises) back down into the living space.
This helps to destratify the air in a room, making it feel warmer without increasing the thermostat setting, thus helping to reduce utility costs.
9. Maintain Your Heating System: Efficiency is Key
A well-maintained heating system runs more efficiently, consuming less energy to produce the same amount of heat. While annual professional servicing is recommended, there are DIY tasks you can perform.
Change Air Filters: This is crucial! Dirty air filters restrict airflow, making your furnace work harder and consume more energy. Check your filters monthly and replace them every 1-3 months, or more frequently if you have pets or allergies.
Keep Vents Clear: Ensure all heating vents are open and unobstructed by furniture, rugs, or curtains. Blocked vents restrict airflow and create cold spots.
Clean Radiators/Baseboard Heaters: Dust and debris can accumulate on radiators and baseboard heaters, reducing their efficiency. Regularly vacuum or wipe them clean.
These simple maintenance tasks can significantly improve your system’s efficiency and directly reduce utility costs.
10. Use Space Heaters Strategically: Zone Heating
Instead of heating your entire home when you’re only occupying one or two rooms, consider zone heating with energy-efficient space heaters. This can be a smart way to reduce utility costs.
Targeted Heat: Use a space heater to warm the specific room you are in, allowing you to lower the central thermostat for the rest of the house.
Safety First: Always use space heaters safely. Ensure they are placed on a stable, flat surface, away from flammable materials, and never leave them unattended or use extension cords not rated for their wattage. Look for models with safety features like tip-over protection and automatic shut-off.
Remember, space heaters are most effective when used to supplement, not replace, your central heating, and only in occupied areas.
11. Insulate Your Electrical Outlets and Light Switches
This often-overlooked area can be a source of significant heat loss, particularly on exterior walls. Cold air can seep in through the tiny gaps around electrical boxes.
Foam Gaskets: Purchase inexpensive foam gaskets designed for electrical outlets and light switches. Simply remove the cover plate, place the gasket over the switch or outlet, and replace the cover plate. This creates an effective air seal.
It’s a quick, cheap, and easy DIY project that contributes to a tighter, more energy-efficient home and helps to reduce utility costs.
12. Block Off Unused Rooms: Don’t Heat Empty Spaces
If you have rooms that are rarely used during the winter (e.g., guest rooms, storage rooms), there’s no need to heat them to the same temperature as your main living areas.
Close Vents: Close the heating vents in these rooms.
\
Close Doors: Keep the doors to these rooms closed.
\
Add Draft Stoppers: Place draft stoppers at the base of the doors to further prevent warm air from escaping into these colder zones.
\
\
By isolating and not heating unused spaces, you reduce the overall volume your heating system needs to warm, thereby helping to reduce utility costs.
13. Cook Smarter: Use Your Oven’s Residual Heat
Your kitchen appliances, particularly your oven, generate a significant amount of heat. You can leverage this to your advantage during colder months.
Leave Oven Door Ajar: After baking or roasting, once your food is removed, turn off the oven and leave the door slightly ajar (but supervised, especially with children or pets around). The residual heat will warm your kitchen and adjacent areas, reducing the need for your central heating system to kick in as frequently.
\
\
This is a simple, no-cost hack that uses energy you’ve already paid for, contributing to your efforts to reduce utility costs.
14. Consider a Humidifier: Feel Warmer at Lower Temperatures
Dry winter air can make a room feel colder than it actually is. Adding some humidity to your indoor air can make a significant difference in perceived warmth.
Increase Humidity: Use a humidifier to add moisture to the air. Humid air retains heat better than dry air, so a room with adequate humidity will feel warmer at a lower thermostat setting.
\
Benefits: This not only helps you feel more comfortable at a lower temperature (allowing you to set your thermostat a degree or two lower), but it can also alleviate dry skin, static electricity, and respiratory issues common in winter.
\
\
By feeling warmer at a slightly lower temperature, you can effectively reduce utility costs.
15. DIY Window Insulating Panels/Reflectors
For windows that aren’t used for light or ventilation and are a major source of cold, you can create removable insulating panels.
Reflective Panels: Cut pieces of rigid foam insulation board to fit snugly within your window frames. You can cover these with fabric for aesthetics or use reflective foil on one side (facing outwards) to bounce heat back into the room.
\
Secure Fit: These panels can be easily removed during the day if you want light, and then reinserted at night. They provide a substantial thermal barrier, especially effective for single-pane windows or those facing particularly cold winds.
\
\
This advanced DIY hack can significantly contribute to your goal to reduce utility costs by minimizing heat transfer through problematic windows.
Conclusion: Embrace the Frugal Home and Enjoy Winter Savings
Winter doesn’t have to be synonymous with exorbitant utility bills. By adopting these 15 practical and often simple DIY hacks, you are not just saving money; you are actively transforming your home into a more energy-efficient, comfortable, and sustainable living space. From sealing those sneaky drafts to strategically using the sun’s free warmth, each step contributes to a cumulative effect that can realistically help you reduce utility costs by 25% or more this winter.
The beauty of these solutions lies in their accessibility and affordability. You don’t need to undertake massive renovations or invest in expensive new appliances to see a tangible difference. Many of these hacks can be implemented with materials readily available at your local hardware store, and often, with tools you already own. The investment of a little time and effort will yield significant returns in the form of lower bills and a cozier home environment.
Start small, perhaps by tackling the most obvious drafts, and gradually work your way through the list. As you implement each hack, you’ll gain confidence and see the positive impact on your energy consumption. Remember to monitor your utility bills to track your progress and celebrate your savings. A frugal home is a smart home, and by taking control of your energy usage, you’re not just saving money for yourself, but also contributing to a more sustainable future.
So, gather your tools, put on some warm clothes, and embark on your journey to a more energy-efficient winter. Your wallet will thank you, and you’ll enjoy a warmer, more comfortable home without the stress of sky-high utility bills. Embrace these DIY hacks to truly reduce utility costs and make this winter your most financially savvy yet!
Matheus Neiva has a degree in Communication and a specialization in Digital Marketing. Working as a writer, he dedicates himself to researching and creating informative content, always seeking to convey information clearly and accurately to the public.